Jun
2014
Enjoy Strawberry Jam Tonight

I’m taking part in the weekly Slice of Life Challenge sponsored by Two Writing Teachers, where teachers write and share each Tuesday. Join in yourself or head over to check out what’s happening with other slicers. If you’re taking part in the SOL, leave a link to your post. I’d love to read it.
June brings strawberries to southern Indiana–red, ripe, lucious berries that beg to be savored. Every day or two, we stroll to the raised bed in our back yard to pick a quart or two or three of starwberrries. Even though we love them, there are only so many berries we can eat before they start to go bad. Our favorite way to preserve them to enjoy through the rest of the year is to make strawberry jam. Now I could go out and buy a package of commercial pectin to make our jam, but I prefer the art of using the natural fruit pectin and sugar to make jam. It takes a little more time and stirring, but it’s really not that hard.
Find guidance:

The Ball Blue Book has everything you need to know.
If you have never made jam or canned fruits and vegetables, you will want to find someone or something to help you do it safely. We started by using the Ball Blue Book years ago. It has directions and recipes for canning (and freezing) almost everything. You can also contact your local agricultural extension office for the latest information on food safety. I grew up helping my mom make jam. I remember her sealing the jars with paraffin. No one every got sick from that jam and jelly, but today food safety experts recommend a water bath canning method for preserving jams and jellies.
Gather jam ingredients and prepare the strawberries:
The recipe I use for strawberry jam is simple:
- 2 quarts strawberries, hulled and crushed, and
- 6 cups sugar.
That’s it. If you can’t walk out into your own backyard to pick strawberries, use the freshest strawberries you can find. Visit a pick it yourself farm or your local farmer’s market. When strawberries are in season in your area, even the grocery stores are more likely to have fresh strawberries, though they will have sat longer than those picked just that morning.
To prepare the strawberries,
- Rinse off any dirt.
- Then cut off the stems and cut the strawberries in halves or quarters. I’ve never tried one of the specialized strawberry hullers. A paring knife works well.
- Mash the strawberries. I use a potato masher to smush the berries in the bottom of a quart, glass measuring cup. You could also use a food mill.

Just add strawberries and sugar!
Gather canning supplies:
Don’t panic. Many of these supplies you may have in your kitchen already. Most are inexpensive, too.
- Water bath canner: I use the smaller size since I can jam in 1 cup jars. The rack keeps the jars off the bottom and makes it easy to take the jars in and out of boiling water. If you don’t have a canner and don’t want to buy one, you can use a large stock pot. Just make sure it is deep enough for water to completely cover the jars. You will also need some sort of metal rack to keep the jars off the bottom of the pot. It might be easier to ask around and borrow one!
- Canning jars with lids and rings: Definitely use real canning jars because the glass is strong enough to take the heat. If you reuse jars that held commercial products, the glass might break during canning. That’s a mess (and a potential hazard) you don’t want to clean up. Canning jars can be reused year after year. So can the rings. You will need to buy new lids to ensure an airtight seal.
- Small pot to boil lids: The lids have to be boiled to sterilize them and to help improve the seal.
- Funnel and ladel: These are to put the jam into the jars.
- Tongs: You can even buy a magnetic lid lifter to help get the lids out of the hot water without burning your fingers. I find that putting the lids in by alternating them upside down and right side up prevents them from sticking together most of the time. Then I can just use a simple pair of tongs to get them out.
- Jar lifter: How else will you take the hot jars out the boiling water?
- Hot pads, towels or paper bags, or boards: Everything is hot, so you will need to protect all your working surfaces from the heat. We set the jam pot on a large cutting board and then fill the jars on paper bags (which can be thrown away afterwards). You could also use cloth towels. You will also need to set the hot jars on a protected surface to cool. Don’t set hot jars to cool on a cold stone countertop. You could crack the jars.

Canning supplies aren’t too scary!
Now that you have everything out, you are ready to start cooking the strawberry jam! Take a deep breath. The biggest skill needed is stirring!
- Put washed canning jars into water bath canner and fill with water. The water should cover the jars by an inch or so. Cover with the lid and bring to a boil to sterilize the jars. Once the water boils, you can then turn off the eye of the stove. The water and jars will remain hot while the jam cooks.
- Put the lids in a small pot and cover with water. Bring to a boil to sterilize. Just like with the jars, you can turn off the eye and put a lid on the pot to keep lids hot. It doesn’t take very long to bring this amount of water to a boil, so you can wait to do it while cooking down the jam.
- Combine crushed strawberries and sugar in a large stockpot. One with a thick bottom will help prevent burning. You will want to use a large pot because the jam will splatter as it boils. I use a large wooden spoon to stir.
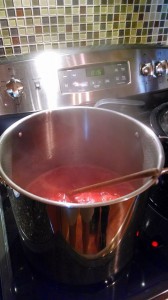
Keep stirring!
- Bring to a boil over medium heat. Stir until the sugar dissolves. Keep stirring occasionally as it comes to a boil.
- Once the strawberry and sugar mixture comes to a boil, keep it boiling rapidly. Keep stirring. How long do you boil and stir? That’s the secret to the art of jam making. The recipe in the Ball Blue Book suggests about 40 minutes, but my jam never takes that long to be ready. Once the color turns to a dark, rich red (after about 30 minutes), I drip some jam on a plate. Once it cools a little, I check the consistency by running a finger through it. The jam will set up firmer as it cools, so err on the runny side unless you like your jam to be thick enough to cut.
- Remove jam from heat. Grab a jar out of the water bath canner and pour out the water.
- Place the funnel on the mouth of the jar and use the ladel to fill the jar with jam. Fill the jar until there is a half inch of space between the top of the jam and the rim of the jar. Continue filling jars until you run out of jam. Most water bath canners can hold seven jars. If I fill more than seven jars, I put the extra jam in a jar to be enjoyed immediately! The extra jar can be stored in the refrigerator.
- Take a wet paper towel and carefully wipe clean the rim of each jar. If there is any jam (or anything else) on the rim of the jar, the lids will not seal.
- Take a lid out of the hot water and place rubber side down on top of the jar.
- Take a ring and screw it down over the lid. Use a tight fit, but don’t overtighten the rings.
- Return jars to the water bath canner and lower into the water.
- Bring water back to a boil and boil for 10 minutes. You will need to boil longer if you are at a higher altitude.
- Remove jars from canner and let cool. For best results, place jars in a location without drafts.
- Once jars have completely cooled (the next day), check that the lids sealed. The lids should not move or flex when you press down on them. If any jars did not seal, store them in the refrigerator.


Enjoy the jam!
Dana Murphy
June 10, 2014 at 10:43 pm (10 years ago)Ok, there is no way I have the kitchen patience to ever do that… but it looks delicious! And it does sound fun, actually. But no way. 🙂
Mrs. McGriff
June 11, 2014 at 8:01 am (10 years ago)It does require patience. I usually read a book while I stir the jam as it’s cooking down.
Ramona
June 10, 2014 at 10:32 pm (10 years ago)I made peach jam years ago! Now with your directions, I might even try to make strawberry jam. My favorite winter treat – homemade apple butter! Anyone have a good recipe for that?
Mrs. McGriff
June 11, 2014 at 8:00 am (10 years ago)We’ve made apple butter before, but I’d have to look up a recipe. It’s been awhile.
elsie
June 10, 2014 at 7:26 pm (10 years ago)There is nothing like homemade jam! What a lucky family to have that always ready to enjoy when the cold winter days return. A taste of summer, doesn’t get any better.
Mrs. McGriff
June 10, 2014 at 7:30 pm (10 years ago)At the rate we’re going through it, I hope we have some left by the time winter rolls around again! Of course, we can always make blackberry jam later in the summer.
writekimwrite
June 10, 2014 at 7:12 pm (10 years ago)How fun and YUM! It makes me want toast to spread it on. Maybe…someday. I will have your detailed instructions ready if I ever do. Thanks.
Mrs. McGriff
June 10, 2014 at 7:16 pm (10 years ago)Toast, crackers, licked right off my fingers–it’s all good. I think my daughter has single-handedly eaten a jar by herself!
Sara Renae
June 10, 2014 at 6:17 pm (10 years ago)I’ve always, always wanted to make homemade jam! I have plenty of canning jars and numerous strawberry plants just waiting to fruit, so with your post, I just might have to make this summer my first 🙂
Mrs. McGriff
June 10, 2014 at 6:57 pm (10 years ago)Have fun making your first jam! It’s not that hard. Our biggest problem has been cooking too long.